
Gundam Air Master |
|
|
|
|
This Gundam X model is one of the models I have done a few times. It's not the last time I would do a model like this, either. I decided to do it a bit differently, a bit better than the previous Gundam Air Master models I have done in the past. The model was released in 1994, so it's not state of the art, but with a bit of work, I can make this one look a bit real. The box cover art has that mid-90s style to it -very eye catching, very nicely done. What you get inside are -
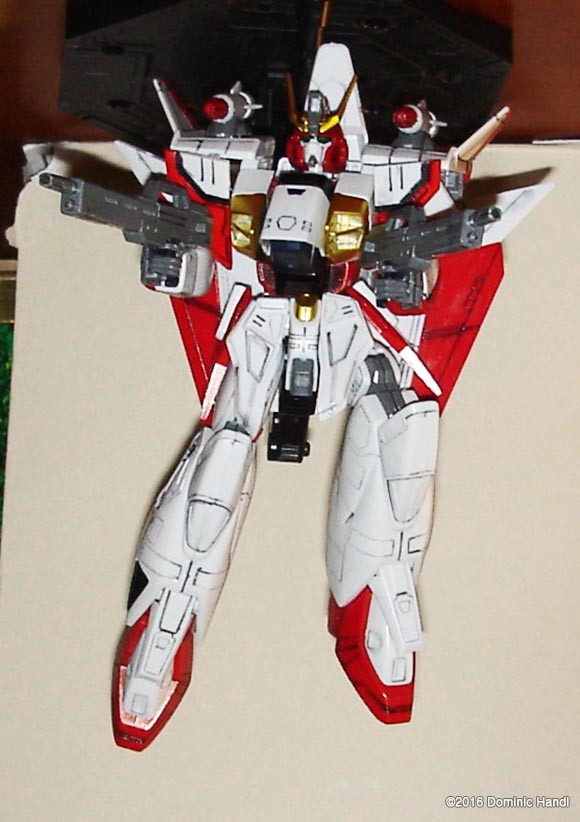
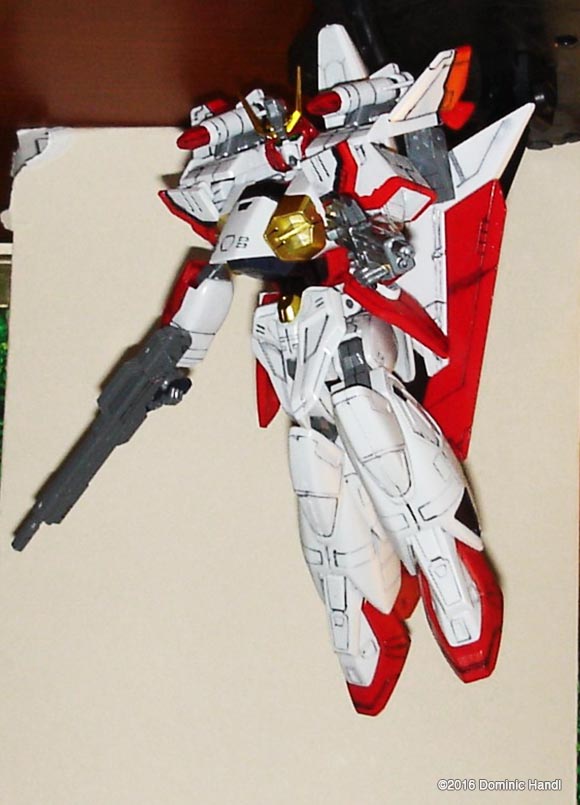
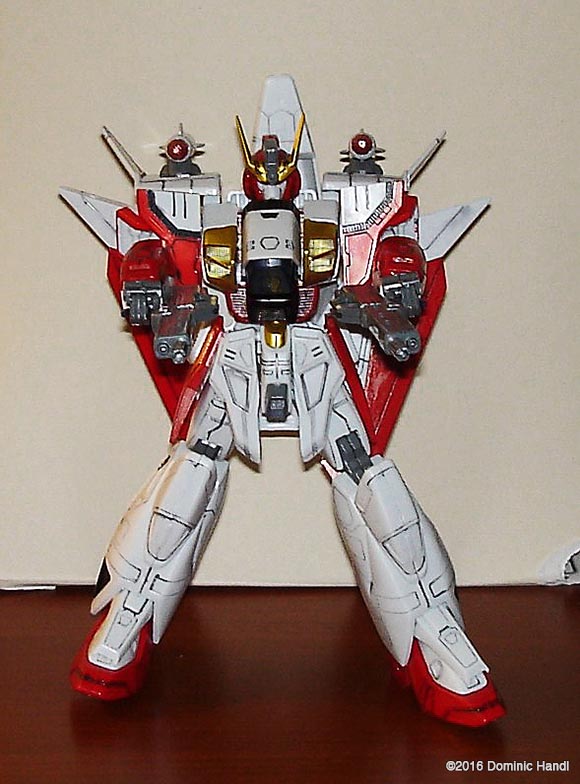
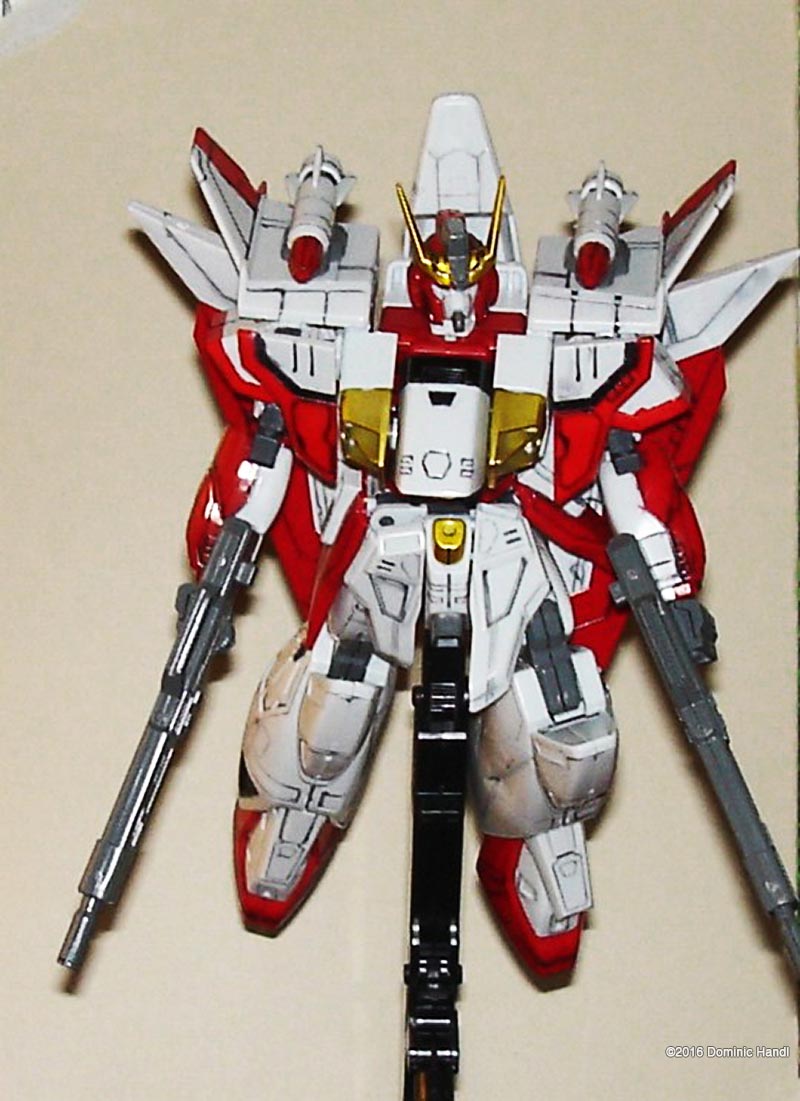
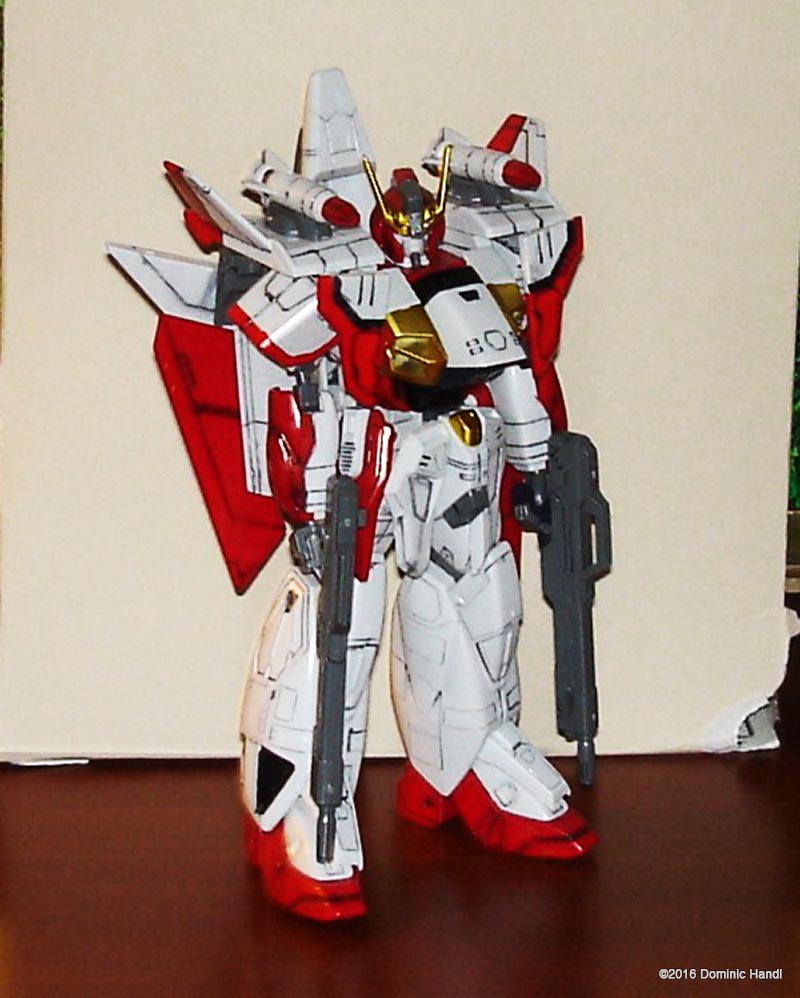
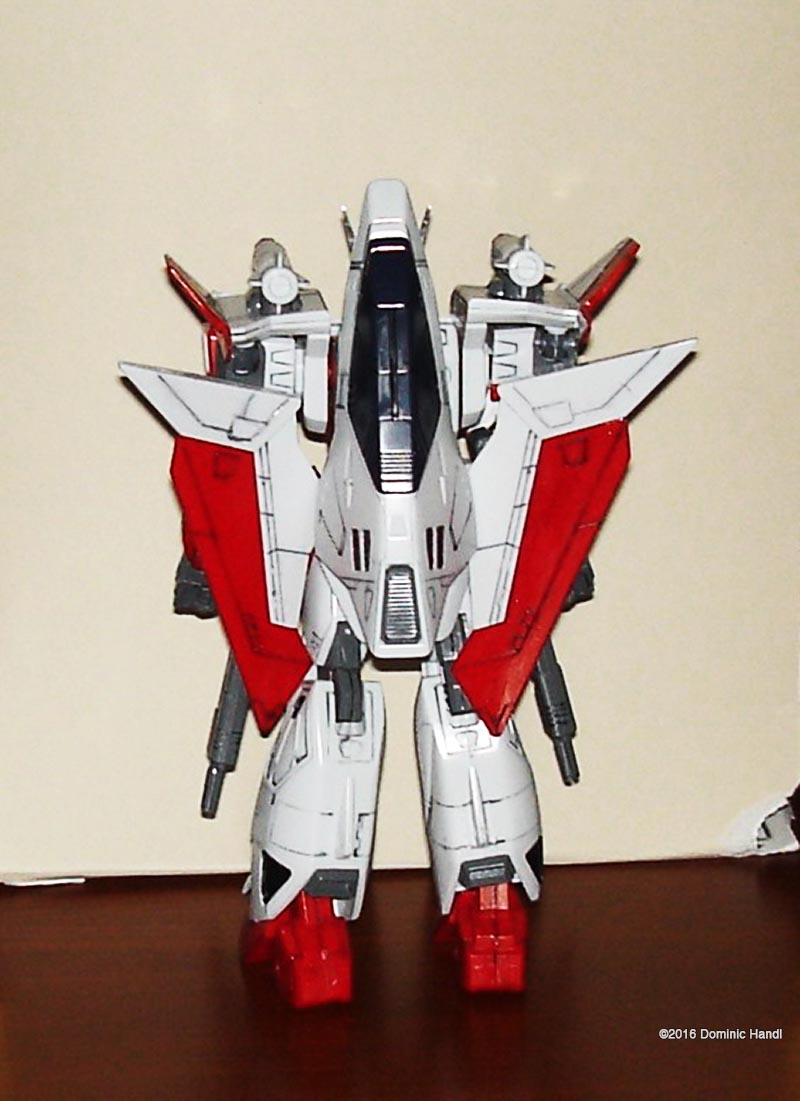
Even for a 90s kit of this age, there were some good panel lining details. It looks like I can do this model in one seating, but that would just take the fun out of actually building it. I paint as much as I can before assembly. A majority of the pieces are all molded in sort of an off white color. This does give the option to paint it or leave the pieces as is. I left them as is. About a quarter of the pieces were molded in red. I painted them in a red color, applying 2 to 3 coats of it and waiting overnight for each coat to dry. It did look a lot better. Then I used a micron pen and went over the panel lines with the black ink. It's normal for there to be excess ink on the sides while doing this. That can be wiped off with a q-tip (cotton bud). For the pieces molded in grey, I just applied the panel line details to them. Later, I put some "Real Touch" ink on the red pieces. It's a thin ink that brings out the details on the raised areas a little, sort of like dry brushing. The eyes, Instead of using the foil sticker, I decided to paint the eyes on. The eyes were molded in this clear green piece. I decided to try something new. I painted the areas around the eyes black and left that part clear green. I assembled the model like the instructions showed. This one is a decent skill level with no skeleton/ internal frame to build first. It was just a straight-out assembly for the whole thing. I still had to do the sub assemblies, from bottom to top. The feet - 8 pieces each - were straight forward. After assembly, the feet are supposed to fold together (for when the Air Master converts to fighter mode). They worked well. The legs had to be assembled in three parts: thighs, knee joints, and lower legs. I painted the outboard vents on each leg a flat black color. Connecting these parts was tricky. The knee joint had to be connected to each poly cap a certain way, so they can connect to the bottom of the thighs and the top of the lower legs. If the knee joint is connected wrong, the whole thing won't work properly when I convert the Air Master to flight mode. I had to be careful when handling that part. The arms had more pieces but otherwise did not present any problems. The lower body is actually molded in one big piece with other small pieces, like the skirt armor for the sides and the front, to go with it. This was no problem to assemble either. Of the whole model, I would have to say the main body and where the cockpit of the Gundam is located within the chest is the most complex part to do. The center piece had to be done first. The two rib cage pieces had to be assembled first and installed onto the center piece. There are two grill pieces that are molded in gold that go on the front of the rib cages. The chest first connects to the belly, and then this whole thing is installed between the ribs. The whole top piece moves to form the fuselage of the fighter, then folds over to form the Gundam's chest. |
The wings - A center piece with the tail, the wings and canards on the front - rests on the shoulders. The wings I had to do first. Then connect that to the center piece. It was designed to fold down ward and fold back. Then I put the canards on next. I tried it out in both modes the extended and folded mode. Those parts worked well. The head was straight forward, with only one poly cap that goes inside for the neck joint. The usual ball and socket joint. The eyes I did earlier looked pretty good with just the clear green. The black color on the sides make it show better. It looks good. The gold V fin goes on the forehead, which is held in place by a sensor on the head. I have to say the face looks good with the lines going down the face guard. This Gundam wasn't armed that much, just two missiles that go on the shoulders and twin buster rifles. Now I didn't have to do much with this these parts. They were all pretty straight forward to assemble. Final assembly- Time to put the whole thing together. Connecting the upper body to the lower body by the hip joint in the middle Then I put the wings on the shoulders. Folding the wings back and folding the canards over the chest. Connected the arms to the shoulder joints and connected the head to the neck joint. Then I connected the nose cone on the back. Then I put the missiles on the shoulders and holstered the twin buster rifles on the side skirt armor, one on each side. I installed the hands to the wrists. I was done. Now to see what this thing can do. The first thing I did was transform the model to flight mode. I had to do some turning and extending and some parts swapping. And some folding (like the legs and the feet). I have to say the flight mode looks really good. Not too many things all over it - a cool looking fighter. Next I transformed it back to robot mode. The model looks really good either way. I have to say it can assume a lot of different poses, and it's quite eye-catching looking like it's firing the two buster rifles. Even in robot mode the wings can open and be extended to the side. That was a neat feature. I have to say it is a very well made kit and a lot of fun to paint and assemble. I always thought transformable mobile suits were pretty neat. They seem to have a sleeker shape than the regular non-transforming MS. I would actually recommend this kit to Gundam fans. Even a beginner can do a kit like this. Image: Front Image: Front Right Image: Rear |
|
![]()
Starship Modeler Home | Site Map | Gallery Main Page | Feedback
This page made possible by Starship Modeler™ - copyright © 2016.