Starship Modeler - The complete information source for modelers who build sci-fi, fantasy and real space subjects


Hulk

By Vernon Parker

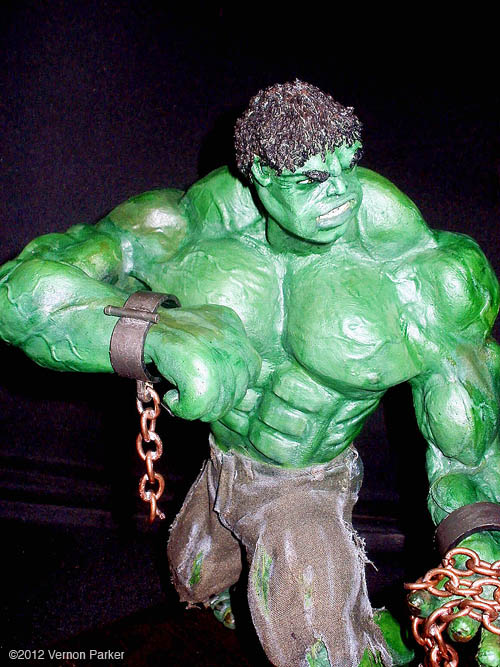
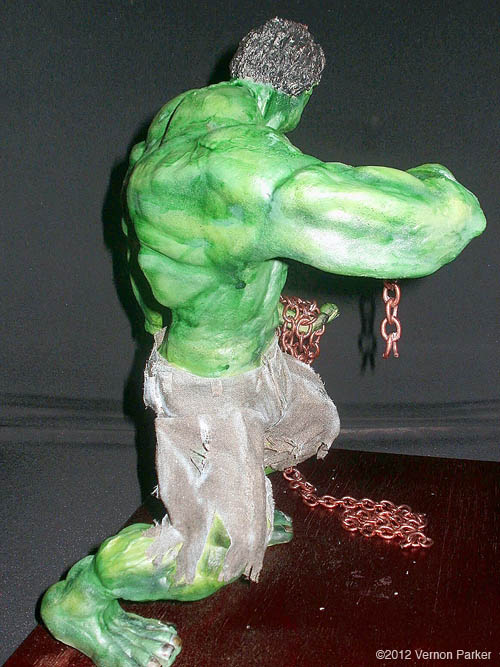
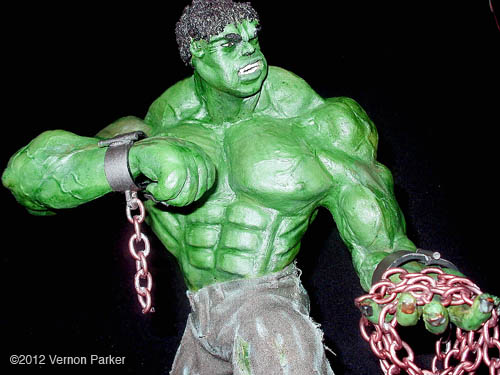
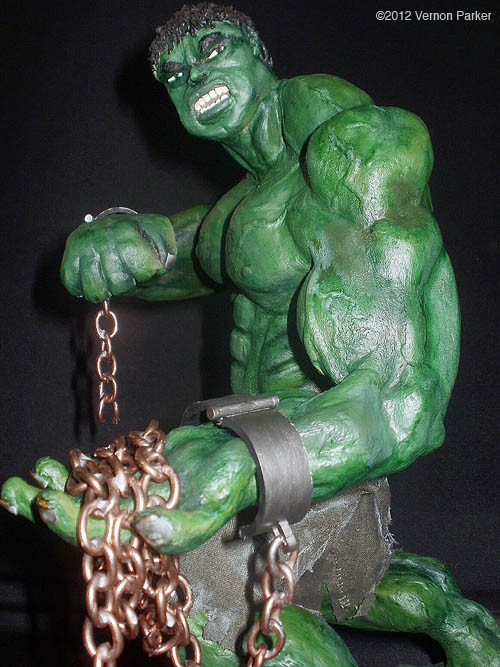
After seeing the new Avengers movie, I set myself the daunting task of creating the Avengers in model form (it would help if they were all available wouldn't it - doh). After completing Captain America and Iron Man, I had a problem - or two! There really isn't a decent Hulk kit available. There are a few out there but these are really way under scale or just don't look very 'Hulky'. Kit manufacturer, Dragon, have some pics on their website of a prototype Hulk kit, based on the Avengers movie version of the Hulk, but there was no definate release date for this when I built these models.

So, I decided to have a go at sculpting the Hulk from scratch. I used a product called Das clay. This air-hardens in about 24 hours but can be kept soft by laying a moist towel over the top, and even when hardened you can wet it and stick fresh clay to it. I've read a lot of criticism that this product doesn't take detail well, but I didn't have any issues getting the level of detail I wanted or could manage with my clumsy and rather shaky hands. I took pictures at every stage so if anyone wants to see a blow-by-blow account of the build, let me know. But in brief...

  • A skeleton was made from thick, flexible wire - I used solder of about 1/16th" diameter as it's flexible but retains it's shape.I actualy built the skeleton on top of a drawing I did of the Hulk to make sure I got the proportions right. I found some interesting 'Hulk drawing rules' such as the distance between feet and waist, waist and head, and shoulder to shoulder is always the same.
  • I covered the skeleton in aluminium foil. This also maintains its shape nicely so you can begin to pose the figure and define musculature.
  • Then a layer of paper mache was placed over the top of the foil. This provides a rigid structure so the clay has something to adhere to and will take some pressure without caving in as you press the clay into shape.

  • Now I could build up the muscles and define details. I did this by cutting out rough shapes of muscles then blending it into the model with a wet finger.
  • Seperately, I made hands following steps 1 and 4 only (fingers are just too small in this scale to warrent lots of layers)
  • Also a seperate head was created. This took 3 attempts to get the features Hulk-like and to the right scale. I found the best method was to start with a cube, carve out eyes and mouth and add in clay to shape the nose, chin and jawline.
  • As the shape and size progressed, I added in the hands and head. As I mentioned earlier, wetting the hardened clay allows fresh stuff to stick to it no problem so I kind of welded all the parts together with fresh wet clay.
  • The hair was also made from clay. I did this by putting a thin layer of clay on in roughly a hairline position then using a sharp knife and 'backcombing' with the blade to fluff it up. This was a complete experiment but I think it works well and it's pretty quick too.
  • The pants were made from actual thin cloth material. The major problem here is that the clay by now is rock hard so my first attempt at making a complete pair of pants then putting them on him failed because the legs dont move and are therefore impossible to stretch over the splayed feet. "Hulk mad!" My solution was to make the pants in seperate pieces, legs and torso, 3 bits which were then glued together with PVA (white glue). Edges and rips in the pants are made with a sharp knife and scissors after everything was in place.
  • Painting began with an automotive primer since I needed to make the whole thing waterproof. I use acrylic paints generaly and have tried to paint clay with this but it looks dreadful on clay, as it absorbs the water base too quickly.
  • Pre-shading in black was followed by different shades of green, and then drybrushing to bring out highlights.
  • The chain is an actual chain bought from a craft store, drizzled in superglue to keep it in shape. The shackles are pieces of electrical trunking chopped in half to fit round the wrists. This was a fortunate error, as I found the Hulk wouldnt balance on his own 2 feet as he is too top heavy, so the chain is used as a 'third' foot to give the model stability.

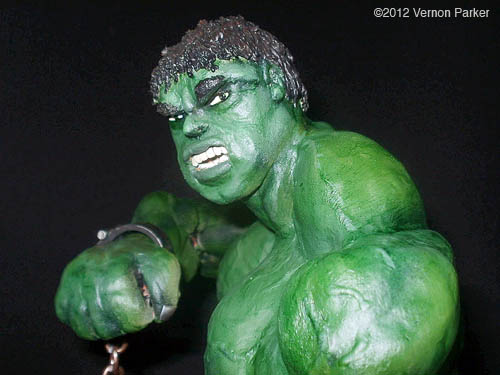
    This model took around 3 weeks to complete, working weekends and a couple of hours in the evenings. He stands around 13 inches high and as he is in a crouched position, compared to the other figures it makes the scale height about 9 feet - about right for the comic version but maybe a little small for the movie version.

    This is my first ever clay model, and it was really an enjoyable experience and good practice on a subject like this as Hulk doesnt have to be anatomically correct. Next up in clay will be Hawkeye from the same Avengers movie which will be smaller and have more fiddly detail bits.

    This model will eventually fit into a planned diorama with all the Avengers characters - although it will be huge!

    Image: Chest

    Image: Face

    Image: Face Right

    Image: Left

    Image: Right

    Starship Modeler Home | Site Map | Gallery Main Page | Feedback

    This page made possible by Starship Modeler™ - copyright © 2012.