
ProShop X-Wing |
|
|
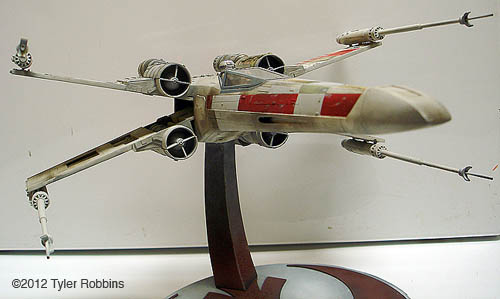
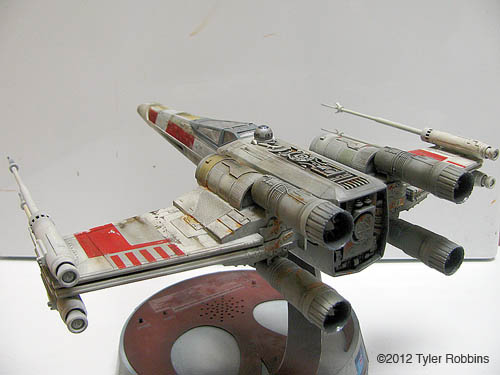
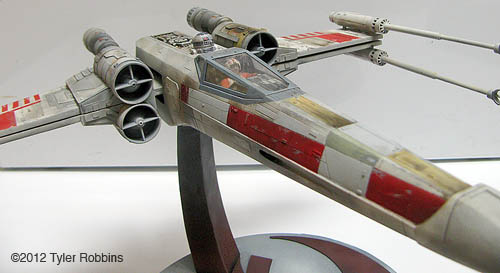
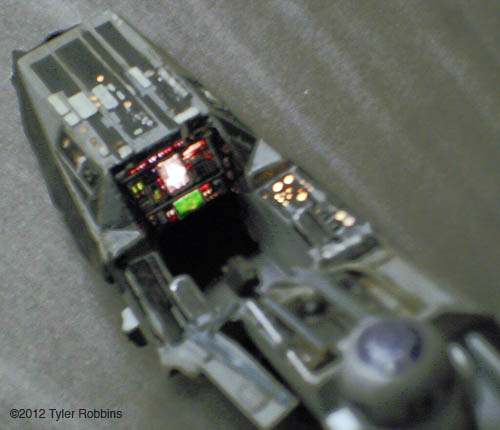
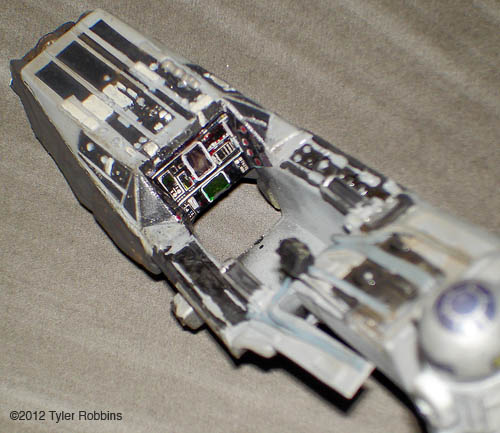
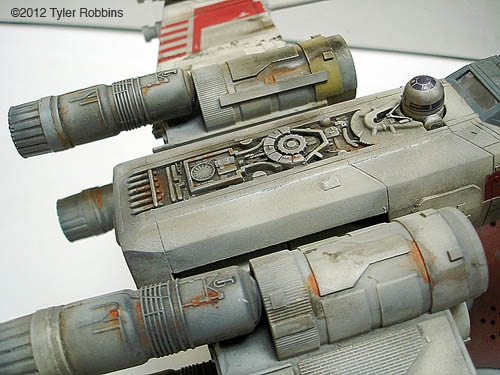
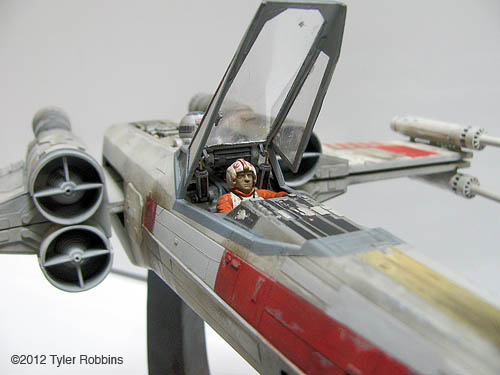
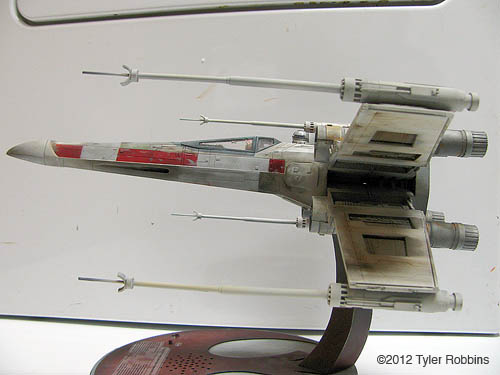
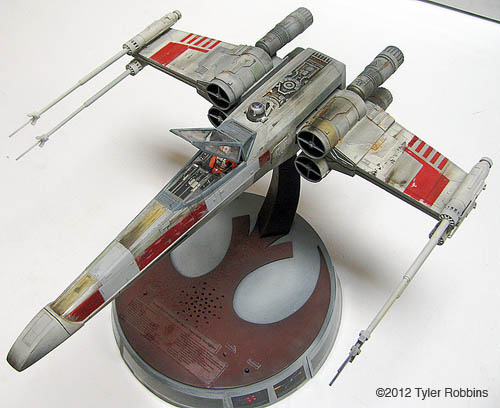
I don't think any sci-fi modeler could pass up building an X-Wing , a lot of us more than one. And there is hardly a more impressive display piece when completed than the 1:35 AMT/Ertl Pro-Shop Electronic X-Wing Fighter. Yeah a lot of modelers ditch the electronics, but c'mon: how many X-Wing models, toy or otherwise, have not only automated wings, but a self-actuating canopy too? Anyway, this is a monster of a kit! It's a good 15 inches long when completed, which is consistent with the published scale of 1:35, with a wingspan of about 14 inches (38cm x 36cm). The overall shape is very faithful to the original miniatures, save for some small concessions in the tail's shape which are not quite the same. The details are where this kit suffers, though. Like the smaller kit, this one has a lot of simplified or just plain wrong detail, and sometimes too much detail! The wings' inner surfaces, for instance, contain many small greebles in the pits where the original miniature had only a couple of small pipes. I replaced a good chunk of this kit. One of the most prominent areas I worked on is the cockpit. The area behind the pilot was just *bad*, and I mean BAD. It would have made a good *mural*, but as far as representing the targeting computer, hydraulic pistons for the canopy, and the various wires and piping that runs down the back of the seat, it's no good. I scratchbuilt a lot of detail, including two functional pistons for the canopy that really raise and lower when it moves. The pilot was nearly perfect, other than his helmet being misshapen and his left glove looking like a Christmas ham. The 'intakes' for the engines have a new support beam. The exhaust can "turkey feathers" were thinned and detailed. The ridiculous detail inside the wings was removed and replaced with simple piping like on the miniature. The laser cannons are almost completely scratchbuilt save for the main body. The engine deck has a ton of new greebles to break it up. The torpedo launchers are now completely hollow and have actual torpedoes in them, ready to kill a Death Star. |
|
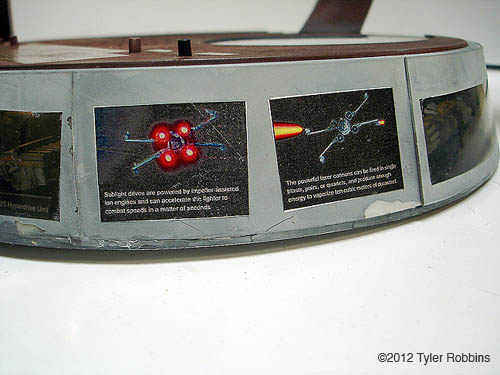
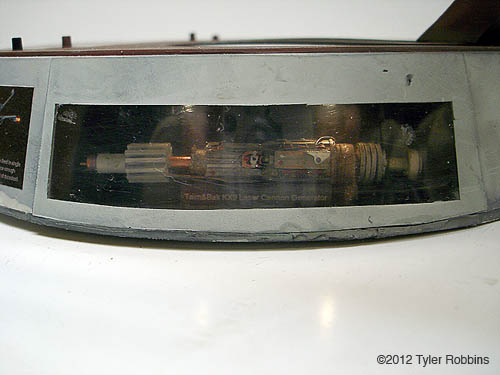
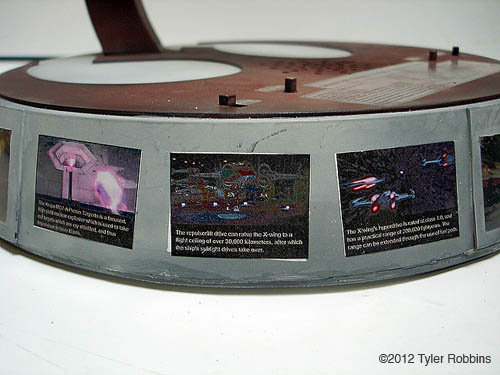
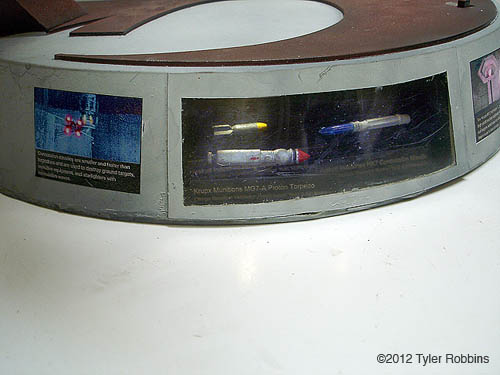
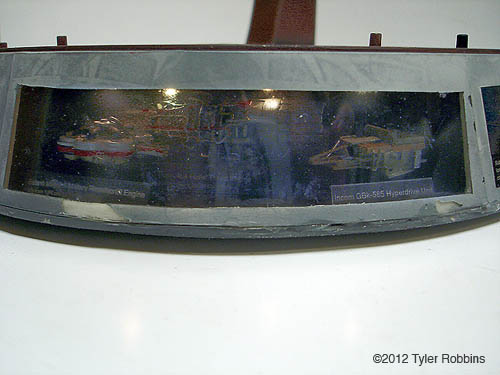
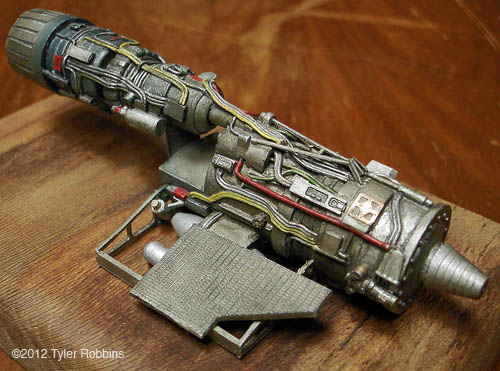
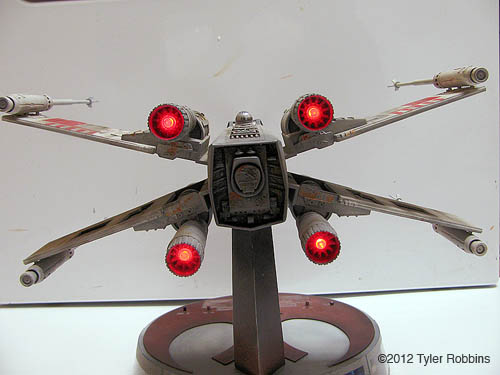
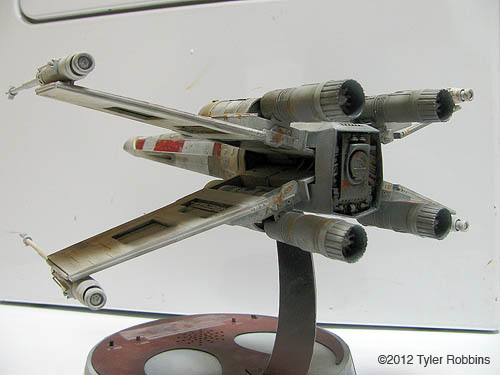
The mechanics were not too bad, but the sheer size of the wing motor gearbox blocks the wings from opening all the way. I cut off a significant amount of the corners of this part, which enabled the wings to fully spread to attack position. The added weight of the brass cannons actually smoothed the action of the mechanism somewhat, so that was a bonus. There were a lot of other modifications done to this build, too many to list here. But one of the biggest areas of improvement has to be the base. I felt all that space needed something to break it up. I thought I could get by with simply adding descriptive text, like in a museum, but then I got completely carried away and added a bunch of small displays featuring components from the 'real' starfighter: the ion drive, repulsorlift projector, hyperdrive, laser cannon, and a selection of missile weapons the ship could be fitted with. Each of these has a light above it and small plaque next to it explaining what it is, what it does, and it's rating (example: Krupx Munitions MG7-a Proton Torpedo, Charge: Baradium, Detonator: Proton-based, Yield: 9,900 Megatons). The ion engine I'm especially proud of. I work at a jet engine refurbishment facility and I get to see real engines all the time, so I was able to put this knowledge into building a realistic-looking fusial thrust engine. Also, the turkey feathers on this engine are 100% scratchbuilt, including the flame holder. I had to build two of these. The first one was a complete model of the entire engine and shield projector. I was going to place this in the base, but it was way too tall. I had to settle for just the combustion chamber. But it looks all right. Back to the cockpit, I created a special decal for the main console which was semi-transparent. I had to use several decal layers and paint on top of the inner ones in order to get the white and silver parts. It looks just about perfect though, especially when it's lit up. The files for the decal can be found on the Scale Model Addict site. The model was painted in Camouflage Gray with Testors Red striping. The off-color panels are all various mixes of green, yellow, and blue gray. I spent a lot of time researching Red Five, trying to get as close to the miniature as possible. The panel lines on the model are not the same as the miniature though, so I had to fudge a few of the off-color panels. I decided to skip the various random decals this time around and focus on getting a good paint job. The weathering was accomplished by first doing a watercolor wash to bring out the panel lines, then an oil wash, and finally I applied masking tape and painted the fresh panels around the fuselage, sealing it all together with weathering powders. All-in-all though I'm extremely happy with how this one turned out. It's probably the best model I've ever built, and was a joy to build. In fact, I'm going to build another one soon. Look for it here. Image: The base, it's like museum display. Image: Cockpit Image: Cockpit Detail Image: Engines Image: Laser Cannon Image: More base. Image: Munitions Image: Pilot Image: Propulsion Image: Engine Image: Left Image: Rear Image: Rear Left Image: Front Left |
|
![]()
Starship Modeler Home | Site Map | Gallery Main Page | Feedback
This page made possible by Starship Modeler™ - copyright © 2012.