
Fine Molds' Millenium Falcon |
|
By Peter Segers |
|
|
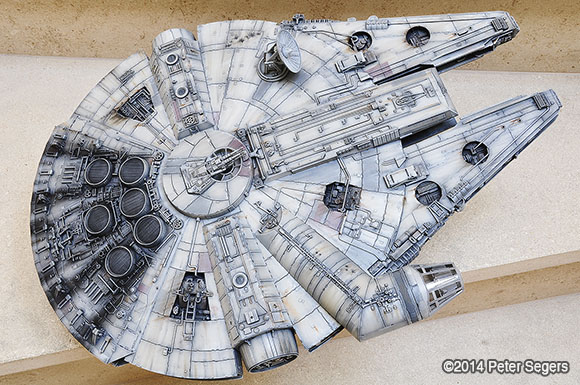
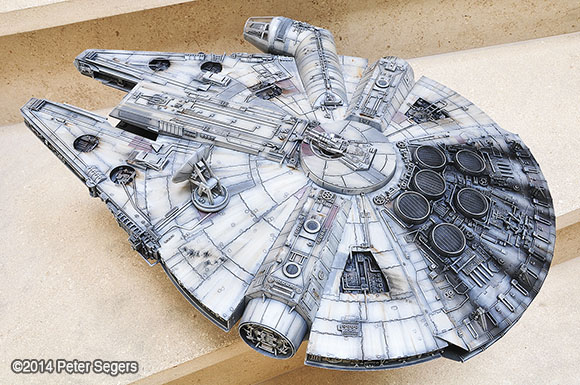
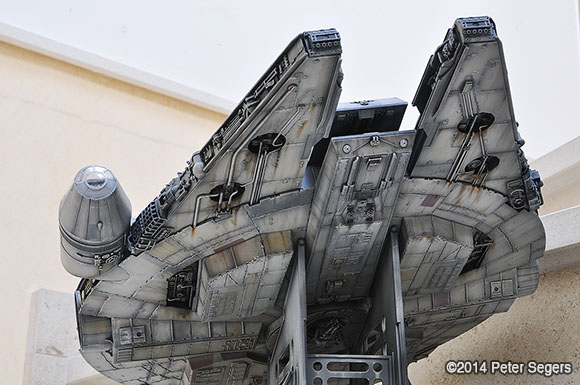
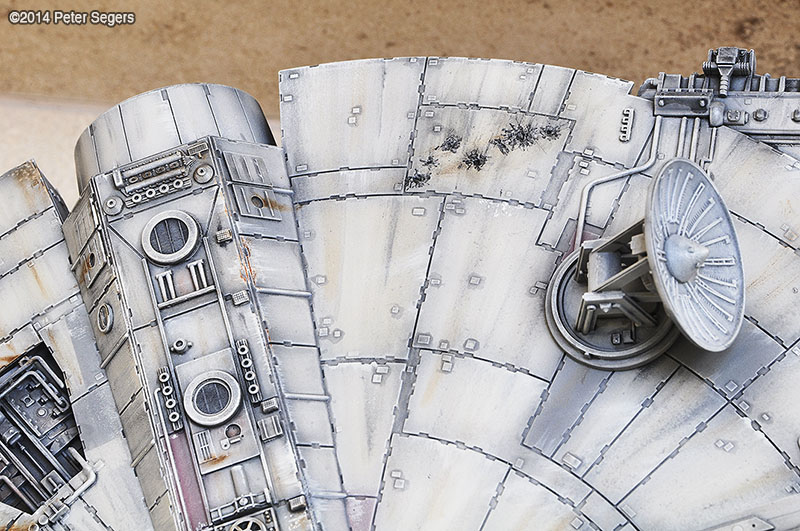
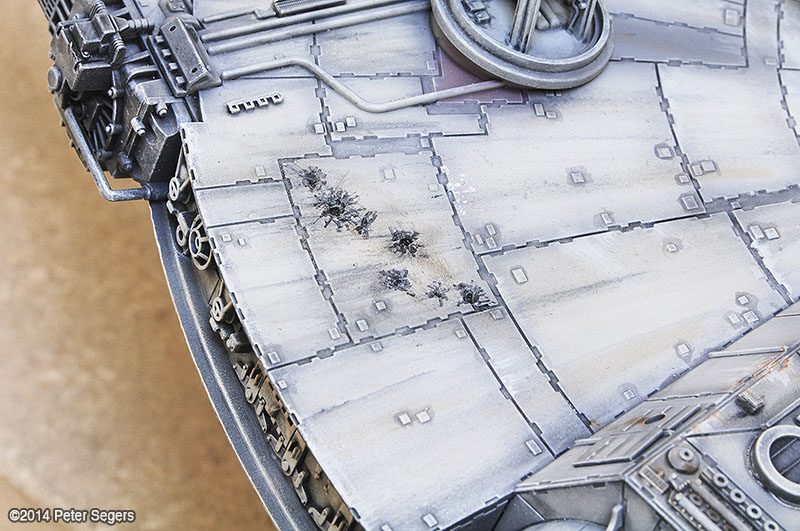
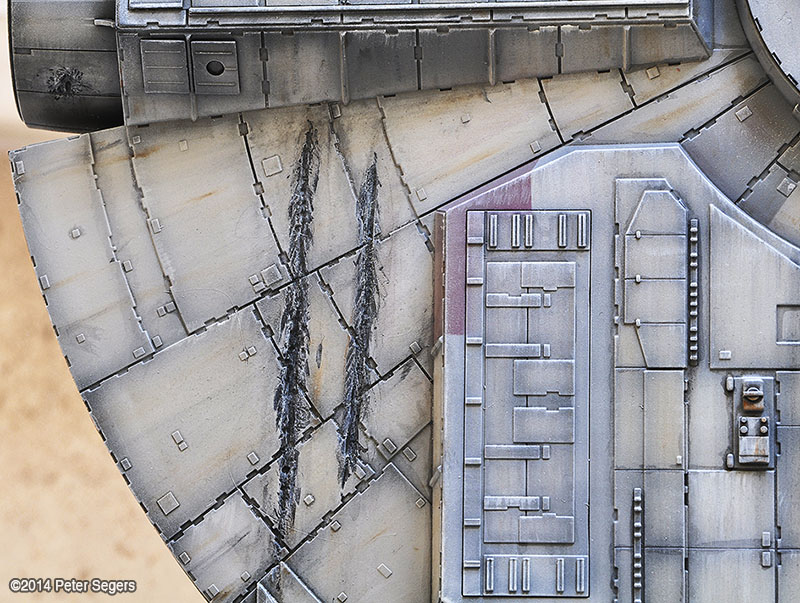
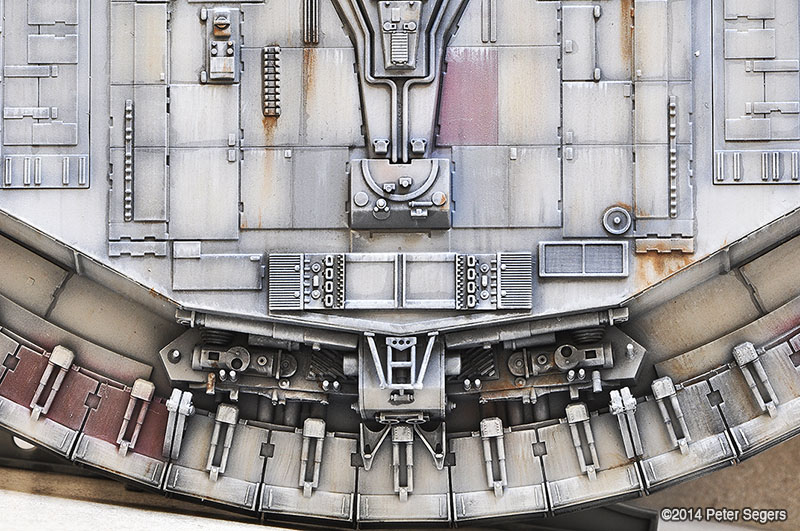
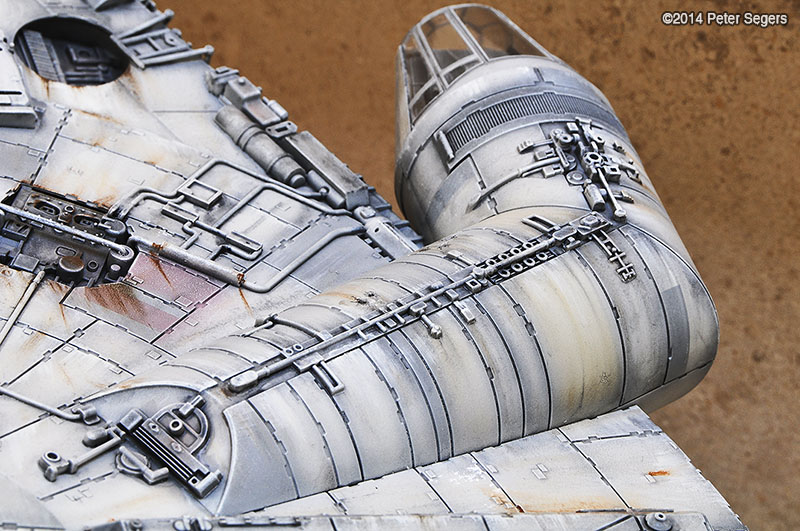
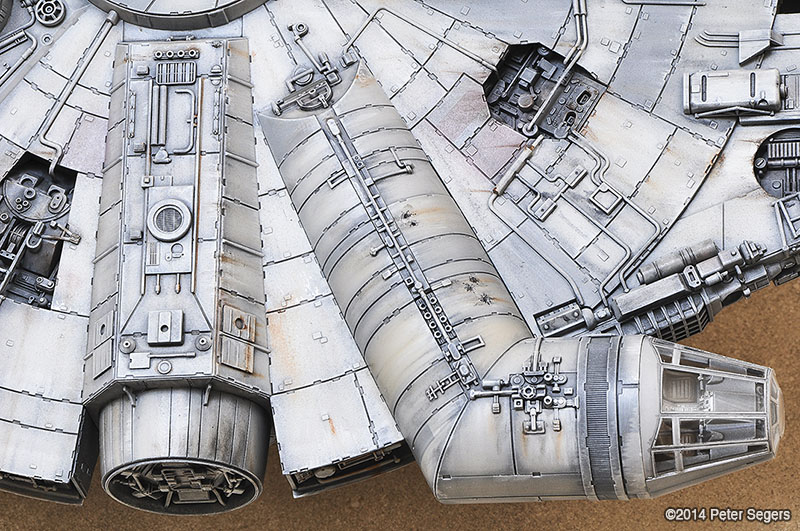
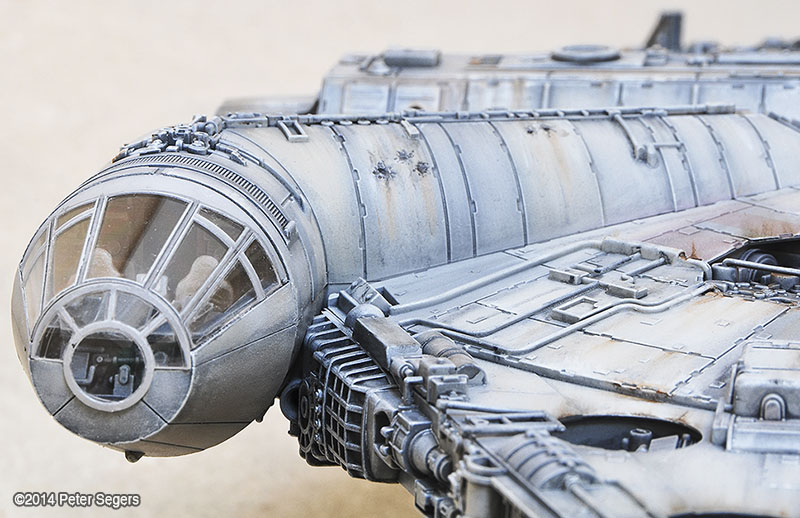
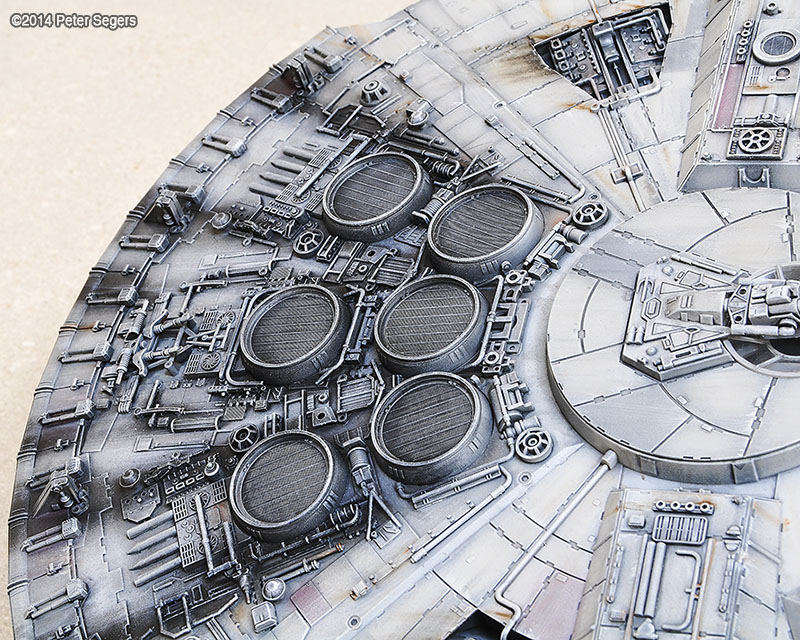
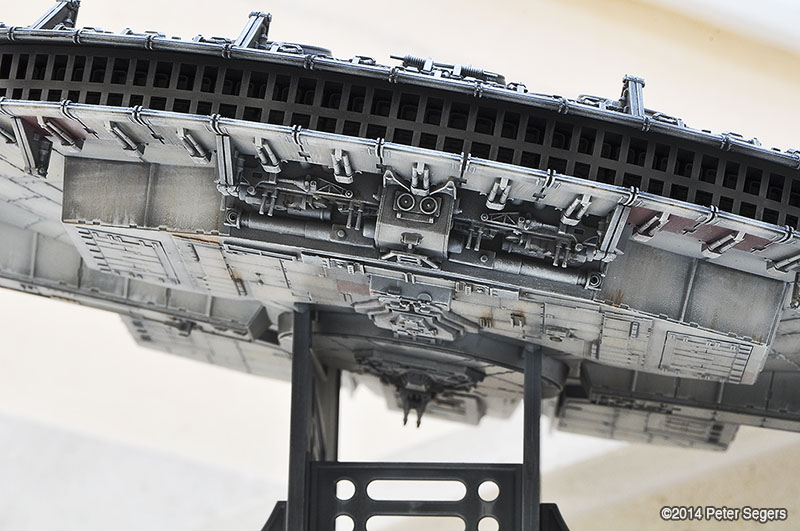
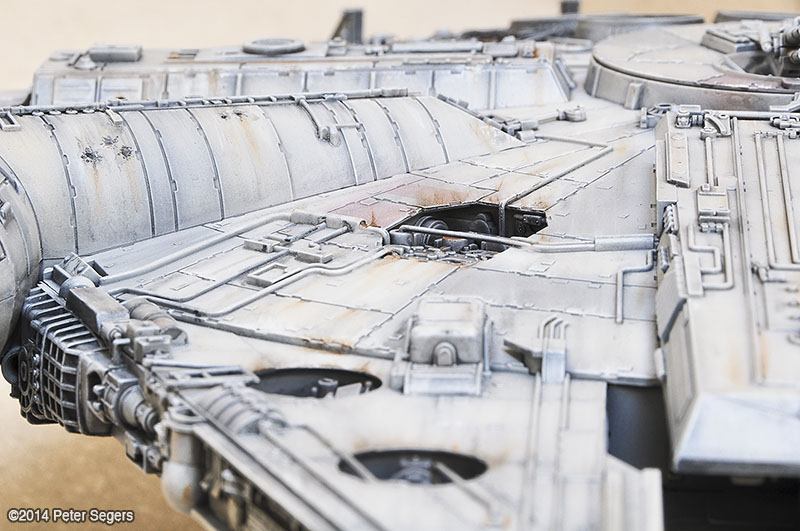
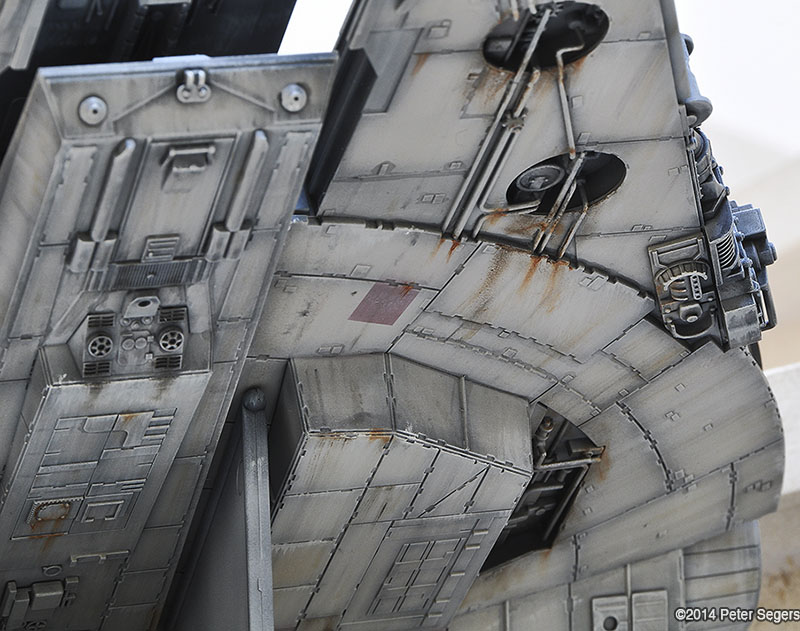
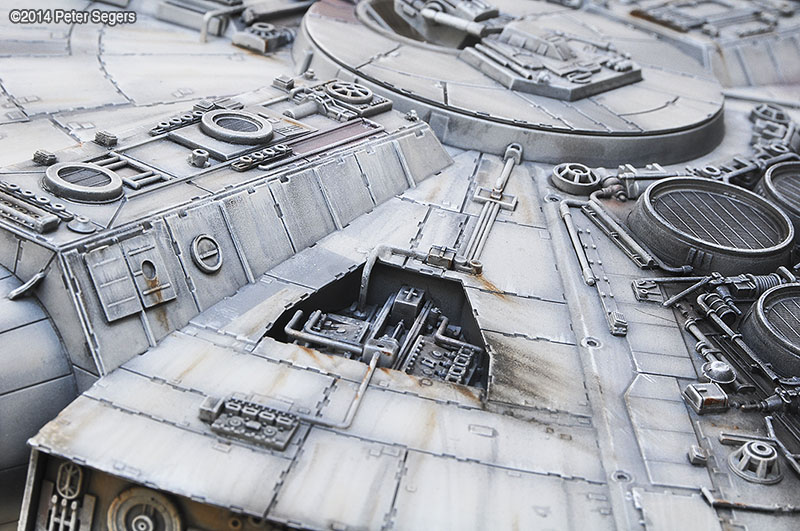
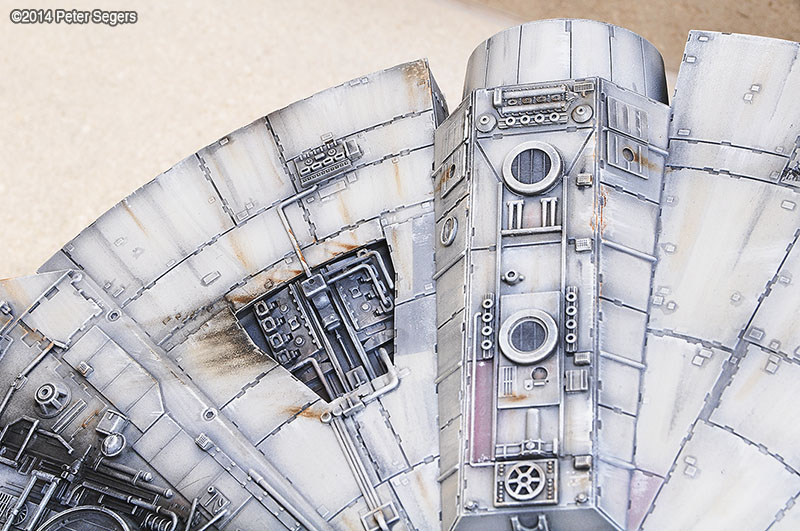
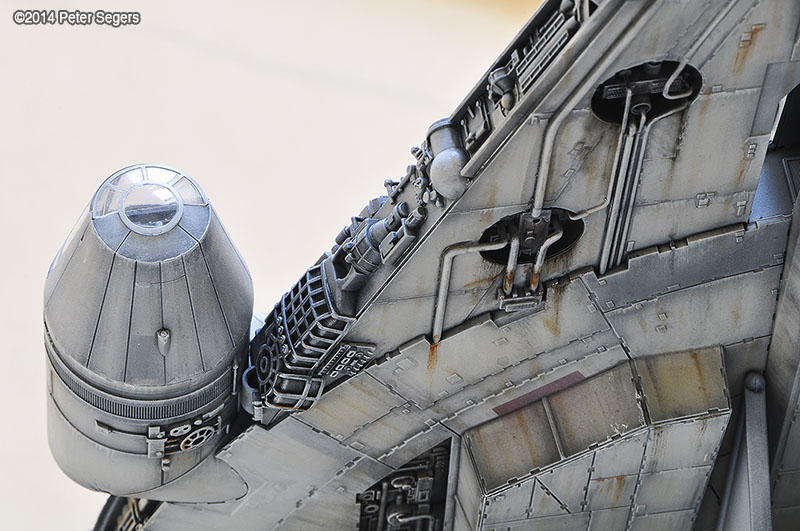
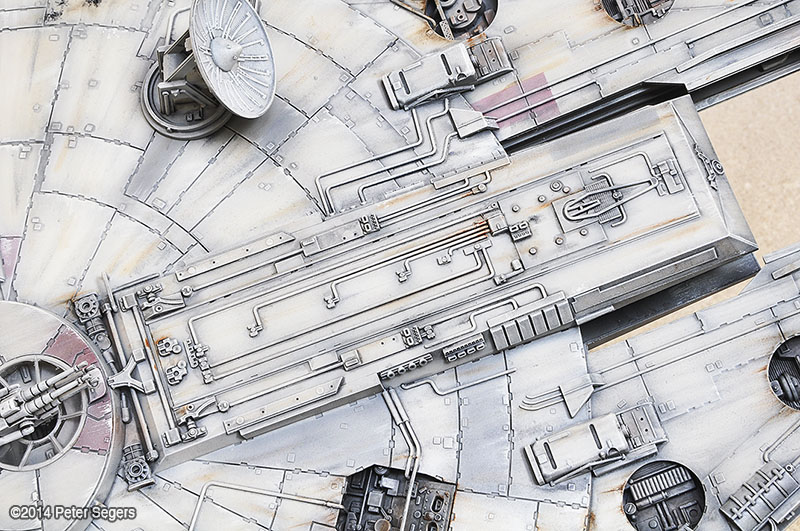
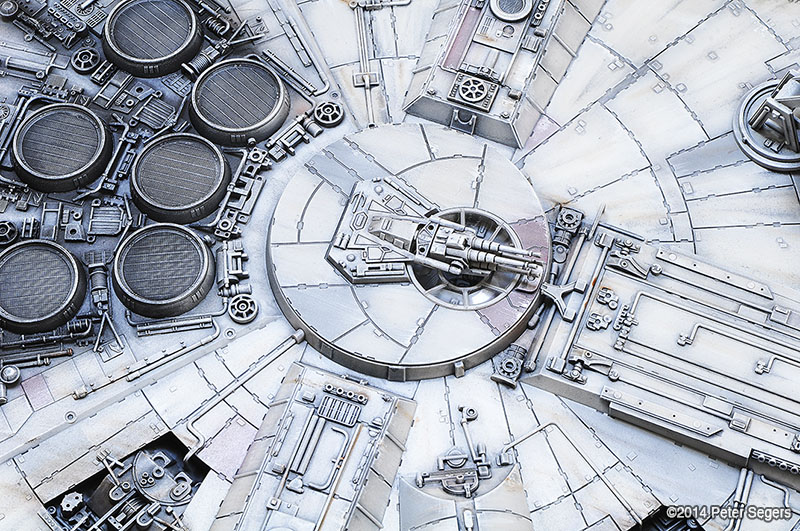
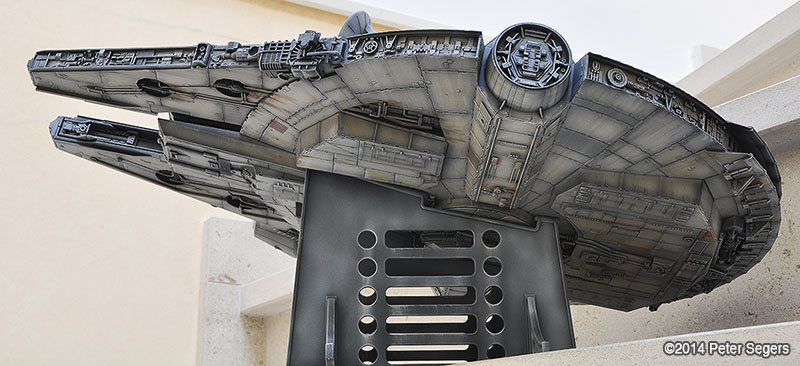
The 1/72 scale Fine Molds Star Wars Millennium Falcon doesn't need any introduction anymore, nor does the original item from the Star Wars movies. Being a great model kit with a high-end quality of detailing, the model was great fun to build and finish. It took me approximately 5 months to complete, but the result is satisfactory. After a pretty straightforward and easy assembing phase, the finishing was basically done by the following subsequent modelling steps: Most fun came from the actual fine-detailing of specific areas like the cockpit and the gangway to the center of the ship, the battle damage areas, the visible engines and piping, the rear exhausts and pulsion area, the rotating guns on top and below, etc... Image: Blast Damage Image: Blast Marks Image: Bottom Scrapes Image: Underside Image: Cockpit Left Image: Cockpit Rear Image: Cockpit Top Image: Cockpit Image: Cockpit Front Image: Engine Deck Image: Grills Image: Bay Image: Mandible Underside Image: Left Right Bay Image: Left Right Bay Image: Mandible Bottom Image: Top Image: Top Turret Image: Left Low Image: Top |
![]()
Starship Modeler Home | Site Map | Gallery Main Page | Feedback
This page made possible by Starship Modeler™ - copyright © 2011.