
Jupiter 2 |
|
|
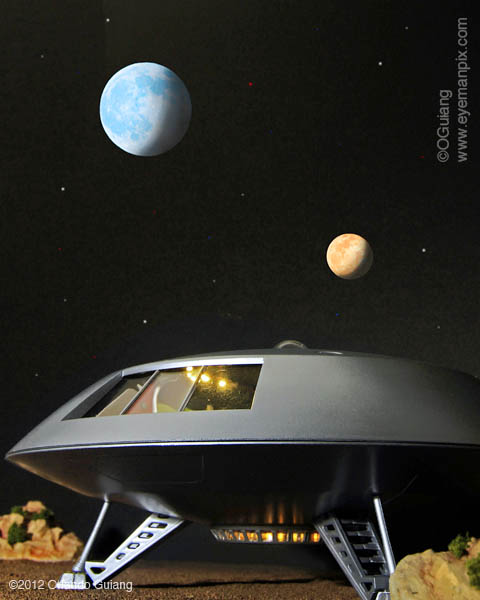
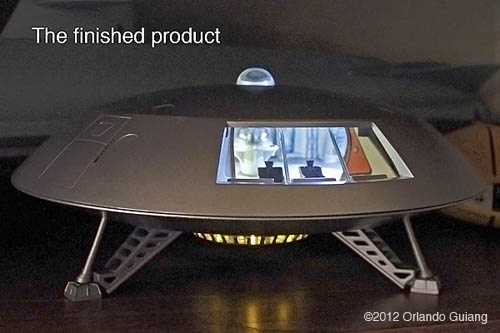
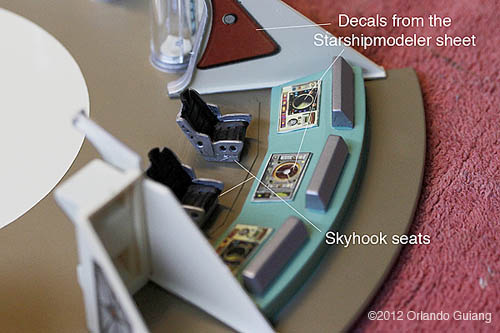
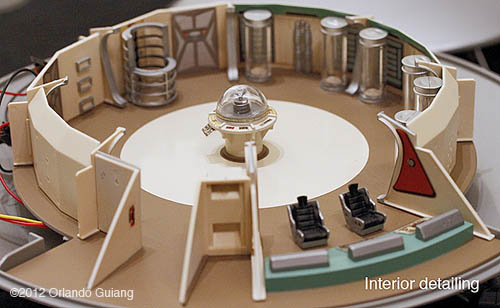
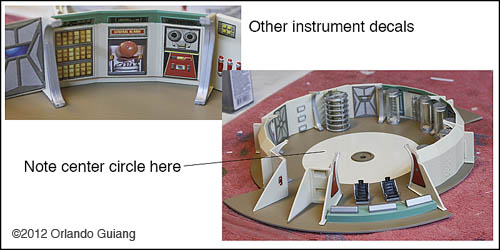
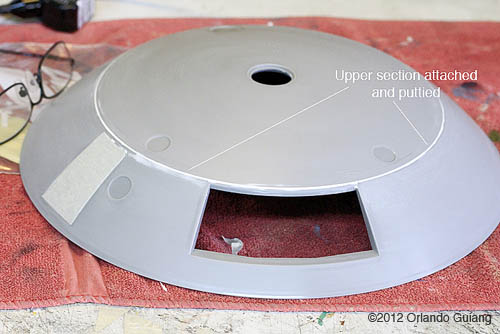
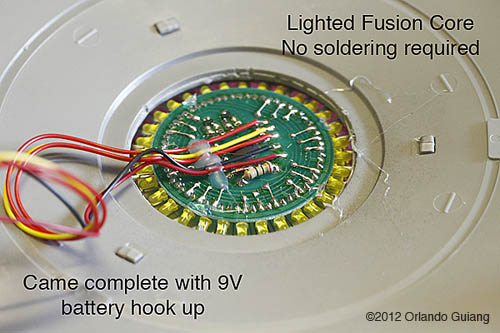
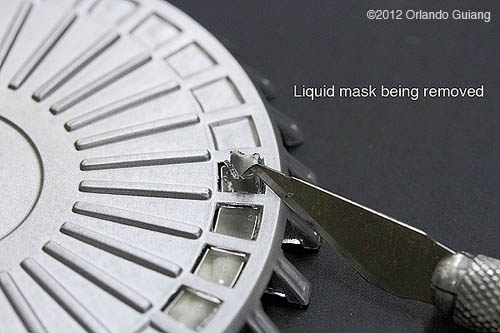
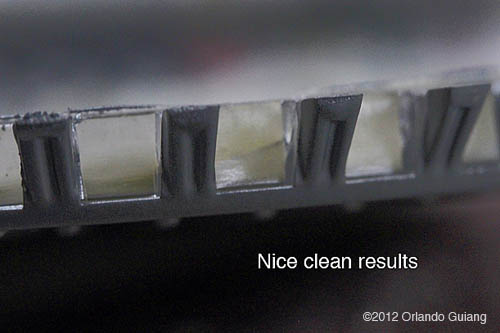
This Polar Lights kit sat in my garage for years and I held off building it because of all the detail and painting that was required for the interior. After recently seeing some build ups of the Jupiter 2 online I was finally inspired to give it a try. I was further prompted to try because of the decal sheet from TSDS that Starshipmodeler.com has available which allowed me to forego all of that time consuming interior detailing and painting. In addition, I found a great deal on the lighted fusion core on Monstersinmotion.com so once I got it, I was off and running. The first challenge for me was in detailing the outside covering of the fusion core. The piece comes as one clear plastic part that needed to be painted. There are individual square lenses, however, that must remain clear so I followed the advice of another builder on Starshipmodeler who used Liquid Mask. This worked beautifully. The mask was applied to each lens 4X over and allowed to dry. I applied numerous coats in order to create a nice thick covering that would be easier to peel away. Once dried, I applied the spray paint then peeled off each lens covering once it was ready to handle. As you can see this resulted in a very neat, clean appearance. For those of you who’ve never used Liquid Mask, definitely give it a try. You won’t be disappointed. The upper hull was next. The model comes with a removable upper section that allows you to view the interior detailing but I decided to glue it together and apply putty for a smoother look. In the end I left the entire upper section unglued to allow access to the switches and batteries for the lighting. Next came the detailing of the interior. Because I was installing the lighted fusion core, I decided to forego building the lower deck. This was suggested by various sources online and I was more than happy to follow along since this cut the build time considerably. The upper deck is very straightforward to put together. Most of the time was spent painting and applying the decals. As you can see the decals make for such great detail. I wouldn’t have done as good of a job with a brush. One special note here is that the decal sheet also comes with the smaller light tan circle that needs to be in the center of the floor. This is easy to apply and keeps you from having to paint such a clean circle. I should also mention that Liquid Mask was also used on the elevator cage and the front windshield. Again, very crisp, clean results were achieved. To further add more accuracy, I replaced the pilot seats and the landing gear footpads with resin pieces from Skyhook models. They weren’t very expensive and I was so thankful that they still were making them. This is a very old kit and most everything currently available for the Jupiter 2 is geared for the newer Moebius version. |
|
The final challenge was lighting and this was fairly easy. The fusion core easily fitted after cutting away and widening the opening of the lower hull with my dremel. The wires run along the bottom of the upper deck and the battery is concealed in one of the compartments (along the exterior of the upper deck). You can see why it was recommended to forget about the lower deck. The interior of the ship was lighted with Easy LED strip lights (by Paragrafix), which were placed on the interior of the upper hull, and I used both cool and warm white lights. Deciding on the colors wasn’t too difficult. I followed the recommendations of the kit and from Culttvman’s Jupiter 2 book. Note that I did not use Metalizer for the hull. The Tamiya Paint was so much easier to work with. It doesn’t rub off nor dulls when a protective coat is applied. This is a great alternative to the Metalizer and was suggested by a modeling forum I ran across online. The paints are as follows: In the end this makes a very nice miniature. No doubt the new Moebius model is more accurate and certainly larger but I was very happy with the final outcome here. I have to say I’m not a huge LOS fan because the stories are so hokey but have very fond memories of watching the reruns with my brother when I was a kid. I would have loved to have this kit as a kid but would not have had the resources to make it come out so well. Thanks Polar Lights for making these wonderful kits available. Image: Interior Rear Image: Interior Image: Fill & Sand Image: Fusion Core Image: Liquid Mask Image: Liquid Mask Results |
|
![]()
Starship Modeler Home | Site Map | Gallery Main Page | Feedback
This page made possible by Starship Modeler™ - copyright © 2012.