
Trade Federation Tank |
|
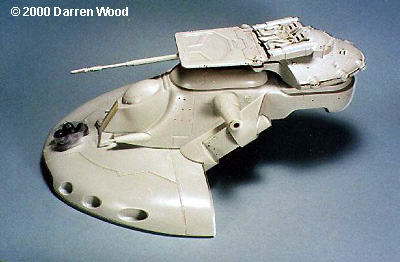
By Darren Wood
|
|
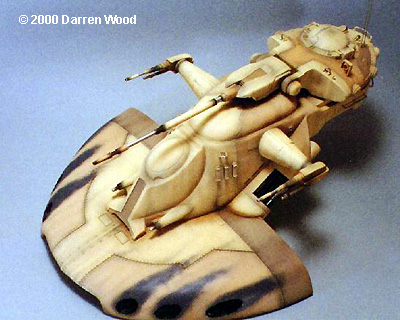
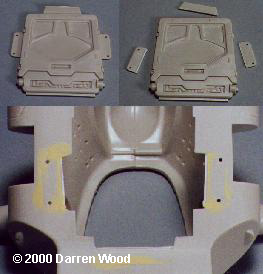
More Pictures: Image: Overhead view. Image: Tabs: the lugs are cut of the loading ramp and glued onto the hull. Image: Weight: most of the major parts are stacked on to the hull to check balance. |
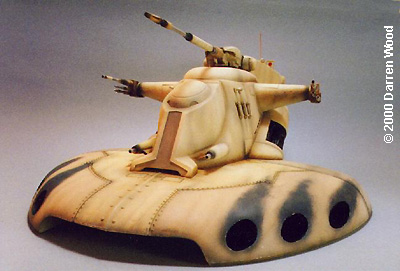
At about 1/32 scale this is a bulky kit, which absolutely dwarfs the previously released Episode 1 models and is second only to the droid and STAP kit in size. It’s still not very complicated but some of the mouldings are big and have the potential to warp. Fortunately the mouldings are thick and I had no real problems with fit, though the alignment holes for most of the kit were smaller than the pegs and so they had to be drilled out. This was the only real flaw I found in the moulding of the model. I like to tackle the hardest parts of a kit first. So, using (my very fuzzy) logic I deduced that the alignment of the ‘hull’ and ‘skirt’ were going to be a pain so I started construction of the model in the middle of the instructions. The first snag I hit was the loading ramp. It had four alignment lugs to locate it into the left and right hull sections. I knew it was going to be better to cut off the left, right and top lugs, glue them into the assembled hull pieces, then fill and sand them before installing the ramp. The ‘skirt’ is effectively made up of the top, bottom, and two curved side pieces. These side pieces are a compound curve that joins the top, front, side and eventually, the bottom. Potentially these could be a problem and clamping them could be difficult. I used a solvent glue to bond the parts but used super glue to tack them in position. I wanted to finish (fill and sand) the skirt before attaching the hull but a problem was looming! There was no way the tank would sit upright on a level surface! It would always tip backwards. |
|
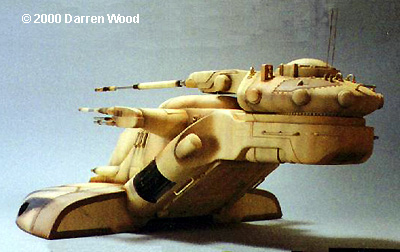
If you never want to take the tank off the stand, no problem! Otherwise it would need nose weight. I found four 6mm (1/4") and one 15mm (1/2") fishing sinkers did the trick. I hit them with a hammer to flatten them a bit and super glued them in position above the ‘tunnel’ at the front. I could now glue, fill and sand the lower and upper skirt halves. The fit of the hull and skirt, as predicted, was not the best but it was acceptable. Because of the intersecting angles of the various parts of the hull and skirt decking, filling would be more trouble than it was worth. The hull has alignment pins and tabs but these tended to hold the parts OUT of alignment to a small degree. I cut the right hand side pins and tabs to get the hull to sit down more snug. When I cemented the two together, I used weight to hold them. The only big gap was below the loading ramp at the join of the hull and skirt. This was filled easily and was in an inconspicuous place. The turret was (as predicted by my fuzzy logic) straight forward and only required minor sanding of the join lines. I wanted to check out testors new range of ACRYL paints so I bought a hand full of colours that I might need. I was never a fan of acrylic paints and unfortunately the acryl paints didn’t change my mind. Two of the things that peeve me about acrylic paints is that they have poor coverage (are transparent when applied) and they clog the airbrush, the acryls’ did both! The acryl range includes a cleaner which is glycol based. Unfortunately to clean anything it needs to be soaked overnight and it does a poor job of flushing through an airbrush. I used acetone to clean out the airbrush. Because the paints come in sachets there is no thinning and virtually no mess. Also when you are using an airbrush you can spray at any attitude (happy, sad or that way you feel when a big lump of congealed paint spits on to your work) without the paint spilling out. My two children (8 and 10) had no problems using (read: not making a mess with) the paint. One advantage/disadvantage of the acrylic paints is they don’t stick to enamel paint. So if you paint them over enamel you can scratch them of at strategic points, giving a chipped look. However masking is a no-no as it will peel up the acryl paint!Unfortunately the Acryl paint did not work out for me and I went on to paint the tank in enamel paints. One of the major complaints I do have about the kit is the very ambiguous painting diagrams. Most of tank is broken up into panels painted subtle shades of sand/tan. However while it may tell you where to start a panel, it does not tell you where to stop a panel. So you wind up having a panel starting with a "hard" scribed line and somewhere else just feathering out to nothing! I painted the kit basically in three testors colours, ‘afrika braun’(sic),’dark tan’ and ‘radome tan’. The kit was then given an over spray of radome tan to give it a faded look. It was then given a weathering of dark brown and black with a black wash around the revets, seams etc.. I hand mottled the blast marks around the ‘torpedo tubes’ on the front of the skirt and painted silver paint chips at appropriate points. If you look at the box art (which apparently is a CG from the movie) on the turret you will see the search light and antennas on the right hand side but they are mounted on the left hand side of the kit! The movie trailers show the antennas on the LH side but no search light! In the kit the domed cupola(?) at the front under the main gun has two slits on either side at its base and a ring around it above the slits. On the box art the cupola is just a dome without any detail! The trailer shows there is detail on the dome. I was disappointed in MY performance on this job! Having to strip away the acryl paint damaged the filling work and wasted a great deal of time. Consequently I could not be bothered (and in some cases able) to re-fill the joins. This is no big deal as there was not much filling in the first place. The kit, though, is big and simple. You would get a good representation with out much work. Most of the work is in the painting. This is a very good kit and well worth collecting. |
|
![]()
Starship Modeler Home | Site Map | Gallery Main Page | Feedback
This page made possible by Starship Modeler™ - copyright © 1999. Last updated 16 August 2016.