
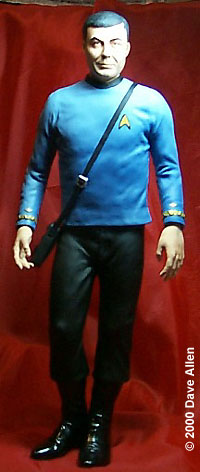
Doctor "Bones" McCoy |
By Dave Allen
|
|
|
This was my first vinyl kit and I had two objectives in mind when I started it. First, I wanted to improve my skills with my new airbrush (Paasche VL and SimAir TC2000 Gold compressor). Secondly, I wanted to see how quickly I could complete a figure kit. Both of these objectives show somewhat in the final product, if you catch my drift, but I had fun on this short (about 5 hours) project. The subject is the AMT/ERTL 12-inch vinyl figure of Dr. Leonard "Bones" McCoy from the original Star Trek series. The kit consists of seven gray vinyl parts, a soft plastic carry kit, and hard plastic base. Somewhere I remembered reading that the flash is easier to trim from vinyl if you warm it slightly first, so I simultaneously cleaned and warmed the vinyl pieces in warm soapy water. As advertised, a sharp Xacto blade slices through the warm vinyl easily and in no time I was checking parts fit. The arms fit reasonably closely to the torso. I used CA Zap-a-Gap to glue these pieces and Magic Sculpt to fill any gaps. The torso did not fit the lower body well at all, being more narrow by about 1/8 inch than the waist. I opted to glue the torso to the waist so that it was correct at the front of the figure and used Magic Sculpt to fill the gap in the back. I extended the torso in the back to overlap slightly the lower part of the body to represent the loose fit of the tunic over the trousers. |
|
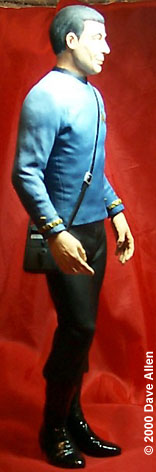
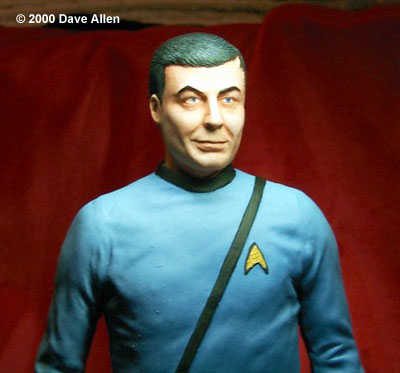
I primed the figure overall with Krylon white sandable primer. I sprayed Testors Flat Black from a can over the boots and pants. Next, when the black paint was dry (barely), I carefully masked the pants right below the waist with liquid latex, then masked the rest of the lower body with aluminum foil and masking tape. I thinned Creamcoat Denim Blue acrylic paint about 1:1 with water and gave the torso and arms two even coats. Next, I thinned Blue Jay and used it to apply highlights, using the airbrush as a "light source" to apply the lighter blue color only to horizontal places like shoulders and the tops of the arms. I separately airbrushed the head and hands with fleshtone. I brushed Creamcoat Raven (black) over the hair and eyebrows, applied shadows to face and hands using a mix of fleshtone and Burnt Sienna, and applied highlights with fleshtone mixed with white. I drybrushed the hair very lightly with a bit of gray. I gave McCoy a good wash of thinned black over his jaw and upper lip -- DeForest Kelley always seemed to have a pretty healthy five o'clock shadow going. The strap for the carry case is partly molded to the torso and partly formed as part of the carry case. I painted the strap on the torso, the Star Fleet badge, and the collar to his tunic black. I glued the head and hands using Zap-a-Gap. The insignia and trim around the sleeves and the inside of the badge were painted with Tamiya Gold. I attached the carry case, which fits neatly into two small depressions in the torso, and sprayed the entire figure with two coats of Testors Dullcoat. Lastly, I brushed Creamcoat Gloss Varnish over the boots to put a shine on them. The figures stands up well enough on its own, so I did not bother mounting it to the plain base that comes with the kit. If I get ambitious, I will custom build a base representing a portion of the floor and wall of the Enterprise. For a one-evening project, I think it turned out pretty well. The likeness is not bad, and the figure is well-proportioned, except for the hands which seem a bit over-sized. I enjoyed this kit and plan to assemble and finish Kirk, Spock and Scotty soon. Image: Closeup of Bones' face. |
||
![]()
Starship Modeler Home | Site Map | Gallery Main Page | Feedback
This page made possible by Starship Modeler™ - copyright © 1999.