
Lunar Reconnaissance Vehicle |
By Andrew Gorman
|
|
|
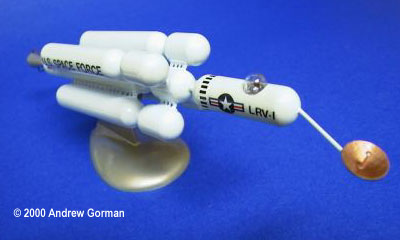
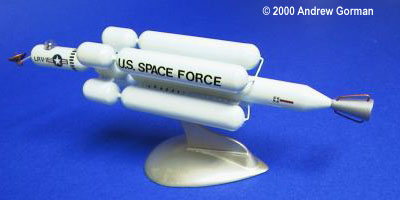
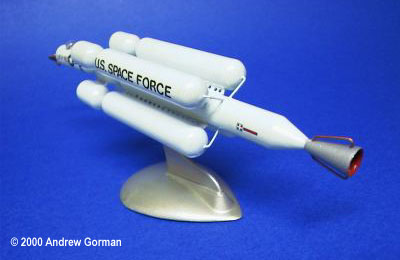
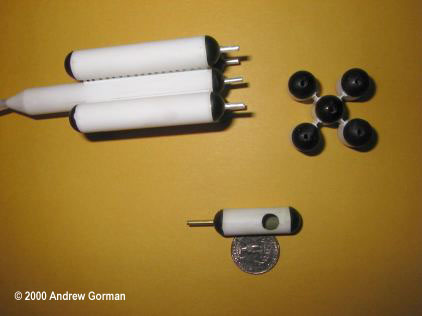
This scratchbuilt version of the old Strombecker Lunar Reconnaissance Vehicle was inspired by a bag of plastic jewelry cabochons I found at a thrift shop. These are solid plastic hemispheres used for costume jewelry, and are available in a wide range of sizes up to 3/4 ". Mine were a half inch diameter, and perfect for tank ends. The LRV definitely has a lot of tanks! I started the project by roughing out a plan based on the box art, which I had found at Sven Knudsen's site. I just eyeballed the picture and fudged proportions until I liked the way it looked. The model is mostly Evergreen tubing and cabochons. The hardest part was finding the centers of the cabochons and drilling them for the aluminum tubing that holds the tanks together. I did this with a pin vise, and after drilling #17 was yearning for a Dremel drill press. An X-Acto miter box was a great help in cutting the ends of the plastic tubing square. The tank stands are Evergreen I-beams with the lightening holes drilled out by hand. Short lengths of aluminum tubing connect the tank ends. I used aluminum because it is softer, and therefor easier to jimmy the tanks into line for final assembly- my hand drilled holes were a little crooked and a little off center. The small diameter piping and radar mast are music wire, which is a great material- thin, tough, and easy to form. And once formed it holds its shape! The rocket nozzle is the bottom of a blood sample vial, the pilot is from an SSP B-58, the canopy is an astrodome of unknown origin, the radar dish is reworked from a Glencoe Lunar Lander with a straight pin for the spike, and the stand is from a Testors XF-92. I tried to match the color to the original Strombecker plastic- a very pale blue. I painted the model with a brush, and really should have painted it before assembling the 5-tank subassemblies. The decals are mostly Chartpak dry transfers, with insignia and details from the parts box. The final finish is several coats of Krylon clear enamel. Once I had the model assembled I was given a copy of the Strombecker instruction sheet and found a few (gasp!) errors I'd made: the outer small tanks should not be directly connected to the center small tank, my tail section is a little too long, and the canopy should be a much smaller astrodome. I'm not changing anything! This was a fun project, and not too difficult. Image: The basic assemblies. |
![]()
Starship Modeler Home | Site Map | Gallery Main Page | Feedback
This page made possible by Starship Modeler™ - copyright © 1999.